Create and publish a product
Create a cannabis wholesale or retail product, add its first variant and media, connect starting inventory, and publish it in Higher Origins.
Updated Sep 17, 2026 Source reviewed Sep 17, 2026 3 minute read
For: brand managerssales teamsinventory managers
Before you create the product
Prepare a customer-facing name and description, product type and category, the first sellable variant, pricing, images, and any inventory record you plan to connect. Confirm the selected business because it owns the finished product.
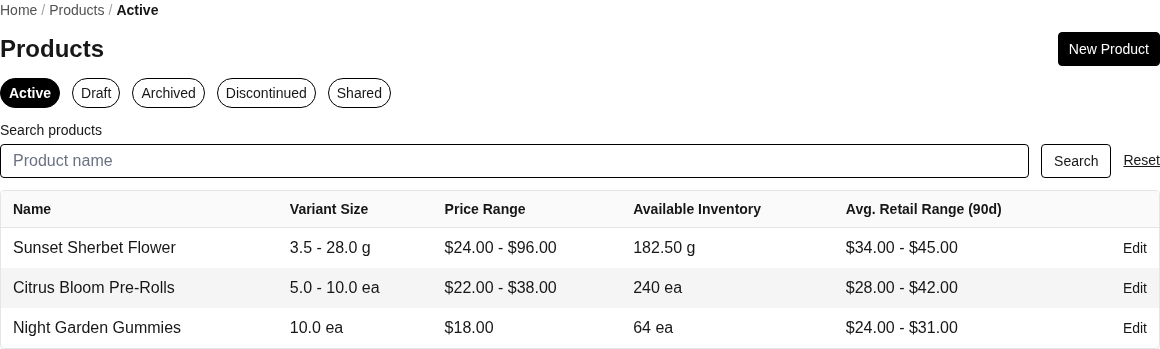
Use Products to find active, draft, archived, discontinued, and shared products.
1. Start the product
Open Products and choose New Product. Product Details begins the setup workflow.
2. Enter product details and the first variant
Name: use the label a buyer should recognize in search, menus, and orders.
Short Description: summarize the product in a sentence; use Description for fuller merchandising details.
Select Type: choose Wholesale or Retail as appropriate. Accounts with Brand management access can also choose Brand.
Select Category: place the product in the correct browsing category.
Distributor License Number: select or enter the license responsible for distribution when the form requires it.
Initial variant: setup uses the product Name for this variant. Enter Quantity, Measure Unit, Min Quantity, and Price for the first sellable configuration.
Strain: select a strain variety; the product form requires it for Wholesale, Retail, and Brand products.
Lineage: optionally add parent strains when they help identify the product accurately.
Keep quantity and measure unit together as a real package, such as 3.5 grams or 10 each. Min Quantity is the smallest number of that variant a buyer can add; Price is the starting unit price before any supported override.
3. Add media
Upload at least one and no more than ten product images. Choose Make Primary on the image that should represent the product in lists and buyer-facing views. You can upload one video. Prepare a video no longer than the 15 seconds recommended by the interface.
4. Connect initial inventory
In Initial Inventory, enter Initial Quantity. Unit Cost ($) and Received Date are optional. Retail and Brand products also require Compliance Batch Number, Packaged Date, Testing Lab License, Lab Test Date, THC Content (%), CBD Content (%), Total Cannabinoids (%), and a PDF Lab Certificate. This creates starting inventory; it does not change Metrc.
5. Review and publish
Review the customer-facing copy, variant quantity, measure unit, Min Quantity, price, primary image, license, and initial inventory. Choose Publish Product when the record is ready. A draft can be completed later from the Draft tab.
After publishing
Open the product to add variants, change media, manage pricing overrides, link or unlink inventory, generate supported labels, share the product, or change its lifecycle state. Add it to a menu when buyers should be able to order it.
Related guides
Products: understand variants, media, inventory links, pricing, labels, sharing, and lifecycle states
Inventory: prepare and troubleshoot the stock connected to products
Create and share a menu: offer published products to buyers